


Java Web 开发:项目二个人开发指导
项目2个人接口开发指导
该文档用来指导大家开发个人接口
依赖
整合web、整合mybatis、整合pagehelper、整合shiro
<dependencies> <dependency> <groupId>org.springframework.boot</groupId> <artifactId>spring-boot-starter-web</artifactId> </dependency> <dependency> <groupId>org.mybatis.spring.boot</groupId> <artifactId>mybatis-spring-boot-starter</artifactId> <version>2.2.1</version> </dependency> <dependency> <groupId>com.github.pagehelper</groupId> <artifactId>pagehelper-spring-boot-starter</artifactId> <version>1.4.1</version> </dependency>
<dependency> <groupId>mysql</groupId> <artifactId>mysql-connector-java</artifactId> <scope>runtime</scope> <version>5.1.47</version> </dependency> <dependency> <groupId>org.springframework.boot</groupId> <artifactId>spring-boot-configuration-processor</artifactId> <optional>true</optional> </dependency> <dependency> <groupId>org.projectlombok</groupId> <artifactId>lombok</artifactId> <optional>true</optional> </dependency> <dependency> <groupId>org.springframework.boot</groupId> <artifactId>spring-boot-starter-test</artifactId> <scope>test</scope> </dependency> <dependency> <groupId>org.hibernate.validator</groupId> <artifactId>hibernate-validator</artifactId> </dependency> <dependency> <groupId>org.apache.shiro</groupId> <artifactId>shiro-spring</artifactId> <version>1.7.1</version> </dependency>
</dependencies>通用部分
跨域
跨域问题,需要在响应报文中增加一些响应头,这个是通用的部分,这时候我们使用CorsFilter来完成
@Configurationpublic class CorsConfig { private CorsConfiguration buildConfig() { CorsConfiguration corsConfiguration = new CorsConfiguration(); corsConfiguration.addAllowedOrigin("*"); // 1 设置访问源地址 corsConfiguration.addAllowedHeader("*"); // 2 设置访问源请求头 corsConfiguration.addAllowedMethod("*"); // 3 设置访问源请求方法 return corsConfiguration; }
@Bean public CorsFilter corsFilter() { UrlBasedCorsConfigurationSource source = new UrlBasedCorsConfigurationSource(); source.registerCorsConfiguration("/**", buildConfig()); // 4 对接口配置跨域设置
return new CorsFilter(source); }}整合MyBatis
引入mybatis-spring-boot-starter依赖,然后配置spring-datasource的相关配置
spring: datasource: driver-class-name: com.mysql.jdbc.Driver url: jdbc:mysql://localhost:3306/mall40?useUnicode=true&characterEncoding=utf-8 username: root password: 123456 type: druid的全限定类名mybatis: type-handlers-package: typehandler的包目录然后在启动类上增加Mapper的包目录配置
@MapperScan("com.cskaoyan.mapper")@SpringBootApplicationpublic class MarketApplication {
public static void main(String[] args) { SpringApplication.run(MarketApplication.class, args); }
}个人信息
需要整合Shiro之后,通过Shiro能够拿到信息
Subject subject = SecurityUtils.getSubject();if (subject.isAuthenticated()) { Object primaryPrincipal = subject.getPrincipals().getPrimaryPrincipal(); //Object principal = subject.getPrincipal();}json格式转换
可以使用SpringBoot的配置文件配置其格式信息
spring: jackson: date-format: yyyy-MM-dd time-zone: GMT+8@JsonFormat写在成员变量上,指定该成员变量的日期格式
- 接收JSON字符串,@RequestBody接收为一个引用类型对象 ,引用类型对象中有Date成员变量
- 响应JSON字符串,@ResponseBody响应引用类型对象 ,引用类型对象中有Date成员变量
分页配置
引入pagehelper的starter之后,引入对应的dialect即可
pagehelper: helper-dialect: mysql配置文件
spring.profiles.active
# application.yml → 主配置文件spring: datasource: driver-class-name: com.mysql.jdbc.Driver url: jdbc:mysql://localhost:3306/cskaoyan_market?useUnicode=true&characterEncoding=utf-8 profiles: active: root,web比如数据用户名密码不一致的情况会导致冲突
不同的开发者,写不同的配置文件
zhangsan的配置文件
spring: datasource: username: zhangsan password: lovexiaofanglisi的配置文件
spring: datasource: username: lisi password: 654321root用户的配置文件
spring: datasource: username: root password: 123456spring.profiles.active里的值不还是会冲突么?
.gitignore 把application.yml给忽略掉
具体部分
首页信息 (/wx/home/index)
核心点:查询首页需要的信息
响应的JSON字符串可以使用Map来封装
Map<String, Object> entity = new HashMap<>();try { entity.put("banner", bannerTask.get()); entity.put("channel", channelTask.get()); entity.put("couponList", couponListTask.get()); entity.put("newGoodsList", newGoodsListTask.get()); entity.put("hotGoodsList", hotGoodsListTask.get()); entity.put("brandList", brandListTask.get()); entity.put("topicList", topicListTask.get()); entity.put("floorGoodsList", floorGoodsListTask.get());}上面的结果可以通过多线程来分别查询,提高效率 → 每个线程中分别做以上的list的查询
其中SystemConfig.getNewLimit(),SystemConfig.getHotLimit()这些值来源于market_system表中的小程序的相关配置(也可以参考后台管理中的小程序配置)

ExecutorService executorService = Executors.newFixedThreadPool(10);// 之前后台管理中的广告管理Callable<List> bannerListCallable = () -> adService.queryIndex();// 之前后台管理中的类目管理Callable<List> channelListCallable = () -> categoryService.queryChannel();// 获取优惠券列表Callable<List> couponListCallable;// 判断是否是登录状态if(userId == null){ //如果是未登录,就查询所有的优惠券中的前三条 couponListCallable = () -> couponService.queryList(0, 3);} else { //如果是已经登录,就查询当前用户还未领取的前三张优惠券 couponListCallable = () -> couponService.queryAvailableList(userId,0, 3);}
// 查询新添加的商品Goods,之后后台管理中的商品管理,商品上架时有选项是否是新品,根据添加时间做排序,limit获取market_system表中的值Callable<List> newGoodsListCallable = () -> goodsService.queryByNew(0, SystemConfig.getNewLimit());// 查询热门商品Goods,之后后台管理中的商品管理,商品上架时有选项是否是热卖,根据添加时间做排序,limit获取market_system表中的值Callable<List> hotGoodsListCallable = () -> goodsService.queryByHot(0, SystemConfig.getHotLimit());// 之后后台管理中的制造商管理,根据添加时间做排序,limit获取market_system表中的值Callable<List> brandListCallable = () -> brandService.query(0, SystemConfig.getBrandLimit());// 之前后台管理中的专题管理,根据添加时间做排序,limit获取market_system表中的值Callable<List> topicListCallable = () -> topicService.queryList(0, SystemConfig.getTopicLimit());
// 查询类目category以及类目下的商品goods,limit获取market_system表中的值Callable<List> floorGoodsListCallable = this::getCategoryList;
FutureTask<List> bannerTask = new FutureTask<>(bannerListCallable);FutureTask<List> channelTask = new FutureTask<>(channelListCallable);FutureTask<List> couponListTask = new FutureTask<>(couponListCallable);FutureTask<List> newGoodsListTask = new FutureTask<>(newGoodsListCallable);FutureTask<List> hotGoodsListTask = new FutureTask<>(hotGoodsListCallable);FutureTask<List> brandListTask = new FutureTask<>(brandListCallable);FutureTask<List> topicListTask = new FutureTask<>(topicListCallable);FutureTask<List> floorGoodsListTask = new FutureTask<>(floorGoodsListCallable);
executorService.submit(bannerTask);executorService.submit(channelTask);executorService.submit(couponListTask);executorService.submit(newGoodsListTask);executorService.submit(hotGoodsListTask);executorService.submit(brandListTask);executorService.submit(topicListTask);executorService.submit(floorGoodsListTask);最后floorGoodsList要先获取一级类目,然后获得其二级类目,然后获得其二级类目下的商品list,期间根据market_system表中的limit做限制数据量
private List<Map> getCategoryList() { List<Map> categoryList = new ArrayList<>(); List<CskaoyanMarketCategory> catL1List = categoryService.queryL1WithoutRecommend(0, SystemConfig.getCatlogListLimit()); for (CskaoyanMarketCategory catL1 : catL1List) { List<CskaoyanMarketCategory> catL2List = categoryService.queryByPid(catL1.getId()); List<Integer> l2List = new ArrayList<>(); for (CskaoyanMarketCategory catL2 : catL2List) { l2List.add(catL2.getId()); }
List<CskaoyanMarketGoods> categoryGoods; if (l2List.size() == 0) { categoryGoods = new ArrayList<>(); } else { categoryGoods = goodsService.queryByCategory(l2List, 0, SystemConfig.getCatlogMoreLimit()); }
Map<String, Object> catGoods = new HashMap<>(); catGoods.put("id", catL1.getId()); catGoods.put("name", catL1.getName()); catGoods.put("goodsList", categoryGoods); categoryList.add(catGoods); } return categoryList;}商品详情信息(/wx/goods/detail)
核心点:获取商品的详细信息
传入的值是goodsId,然后查询相关的信息
Map<String, Object> data = new HashMap<>();// goods的信息data.put("info", info);// 已经收藏该商品的用户数量data.put("userHasCollect", userHasCollect);// 后台管理中的通用问题data.put("issue", issueCallableTask.get());// 商品评论data.put("comment", commentsCallableTsk.get());// 规格列表 goods_specification表 → 注意按照响应结果的格式来封装data.put("specificationList", objectCallableTask.get());// 货品信息 goods_product表data.put("productList", productListCallableTask.get());// 参数信息 goods_attribute表data.put("attribute", goodsAttributeListTask.get());// 制造商信息data.put("brand", brandCallableTask.get());// 是否分享data.put("share", SystemConfig.isAutoCreateShareImage());// 商品分享图片地址data.put("shareImage", info.getShareUrl());可以参考上面/wx/home/index使用多线程来完成,也可以直接写业务代码
相关商品(/wx/goods/related)
核心点:根据当前商品查询其相关的商品
请求参数可以直接接收
@GetMapping("related")public BaseRespVo related(Integer id) { CskaoyanMarketGoods goods = goodsService.findById(id); if (goods == null) { return BaseRespVo.badArgumentValue(); }
// 推荐同类目的其他商品 int cid = goods.getCategoryId();
// 查找六个相关商品 int related = 6; List<CskaoyanMarketGoods> goodsList = goodsService.queryByCategory(cid, 0, related); return BaseRespVo.ok(goodsList);}购物车中货品的数量(/wx/cart/goodscount)
核心点:查询购物车中的货品数量
先查询到用户id的信息,然后根据用户用户id查询该用户的购物车中的货品数量
接下来开始继续开发吧
购物车中添加记录(/wx/cart/add)
核心点:接收JSON数据对象,添加到数据库中,要绑定用户信息,信息要来源于Shiro,
首先获得用户信息,用户信息参考通用部分/个人信息
判断商品是否存在,
需要判断购物车是否有这个商品的记录,如果已经有的话,需要合并购物车,在已有的购物车记录上添加数量
需要根据规格判断库存
购物车(/wx/cart/index)
查看购物车首页,查询当前用户的购物车记录,计算选中的商品(checked=1)的数量和金额
首先获得用户信息,用户信息参考通用部分/个人信息
暂时不需要写登录 → 用户先写死 Integer userId = 1; → 购物车查询的就应该是 → userId为1的这个用户的购物车
购物车商品标记(/wx/cart/checked)
修改选中商品的选中状态(checked = !checked),然后重新执行/wx/cart/index做的事情,返回结果类型一致
立即购买(/wx/cart/fastadd)
做的事情和/wx/cart/add基本上是一样的,add请求如果购物车中已经有这个商品了,可以做合并;fastadd如果购物车中已经有该商品了,可以覆盖掉
这里的返回值是在market_cart表中该记录的id
结账信息(/wx/cart/checkout)
生成购物车结账信息
这个接口的计算金额部分会比较繁琐,耐心点儿做
如果cartid=0则是通过购物车下单的,查询当前用户选中的商品(checked=1)的结账信息;如果cartid !=0 则是通过商品详情页立即购买生成的下单信息,然后根据fastadd添加的cart记录计算下单信息
然后
-
判断地址状态,addressId=0,查询该用户的默认收货地址;不为0查询当前地址
-
判断优惠券状态,如果为couponId=-1,则查询可用的优惠券数量;如果大于0,则使用指定的优惠券
- 要注意判断优惠券的可用状态:优惠券是否已经删除、该用户是否有该id对应的优惠券、优惠券是否过期、结账总金额是否满足
-
根据该用户的购物车中选中的记录(checked=1),计算总金额,如果金额超过运费满减金额(后台配置管理),则不添加运费,如果不超过运费满减金额,则需要添加运费,如果可以使用指定优惠券,减去优惠券的金额;也就是
- 实付金额 = 商品合计 - (商品合计 > 运费满减金额?0:运费) - 优惠券金额
提交订单(/wx/order/submit)
购物车结账信息再重新计算一次;额外去做的事情添加order和orderGoods记录,由于项目2不做支付,订单状态可以直接定义为待付款,删除购物车中的记录(可以逻辑删除),同时减去库存,如果库存不足可以抛出异常,给出提示信息,如果使用了优惠券,要将优惠券状态标记为已使用
额外说明
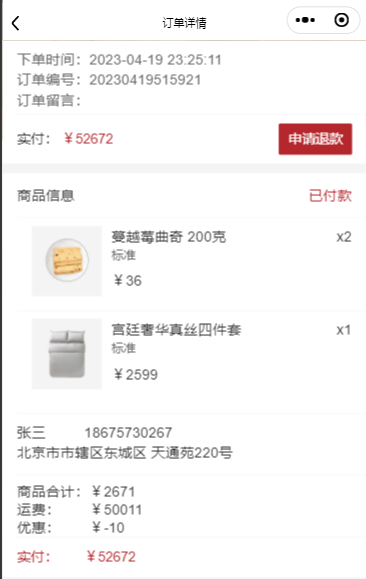
订单信息中的handleOption是可以操作的选项,handleOption中的哪些值为true,基本上就是显示哪一些按钮
比如已付款的订单的handleOption

aftersale: 申请售后(这个也可以不管)
cancel:取消订单
comment:去评论(该值为true且该order_goods没有评论的前提下才会显示该按钮)
confirm:确认收货
delete:删除订单
pay:去付款
rebuy:再次购买
refund:申请退款
其中refund为true,意味着申请退款按钮显示
其余
有问题及时问,目前我就是大家的产品经理
文章分享
如果这篇文章对你有帮助,欢迎分享给更多人!